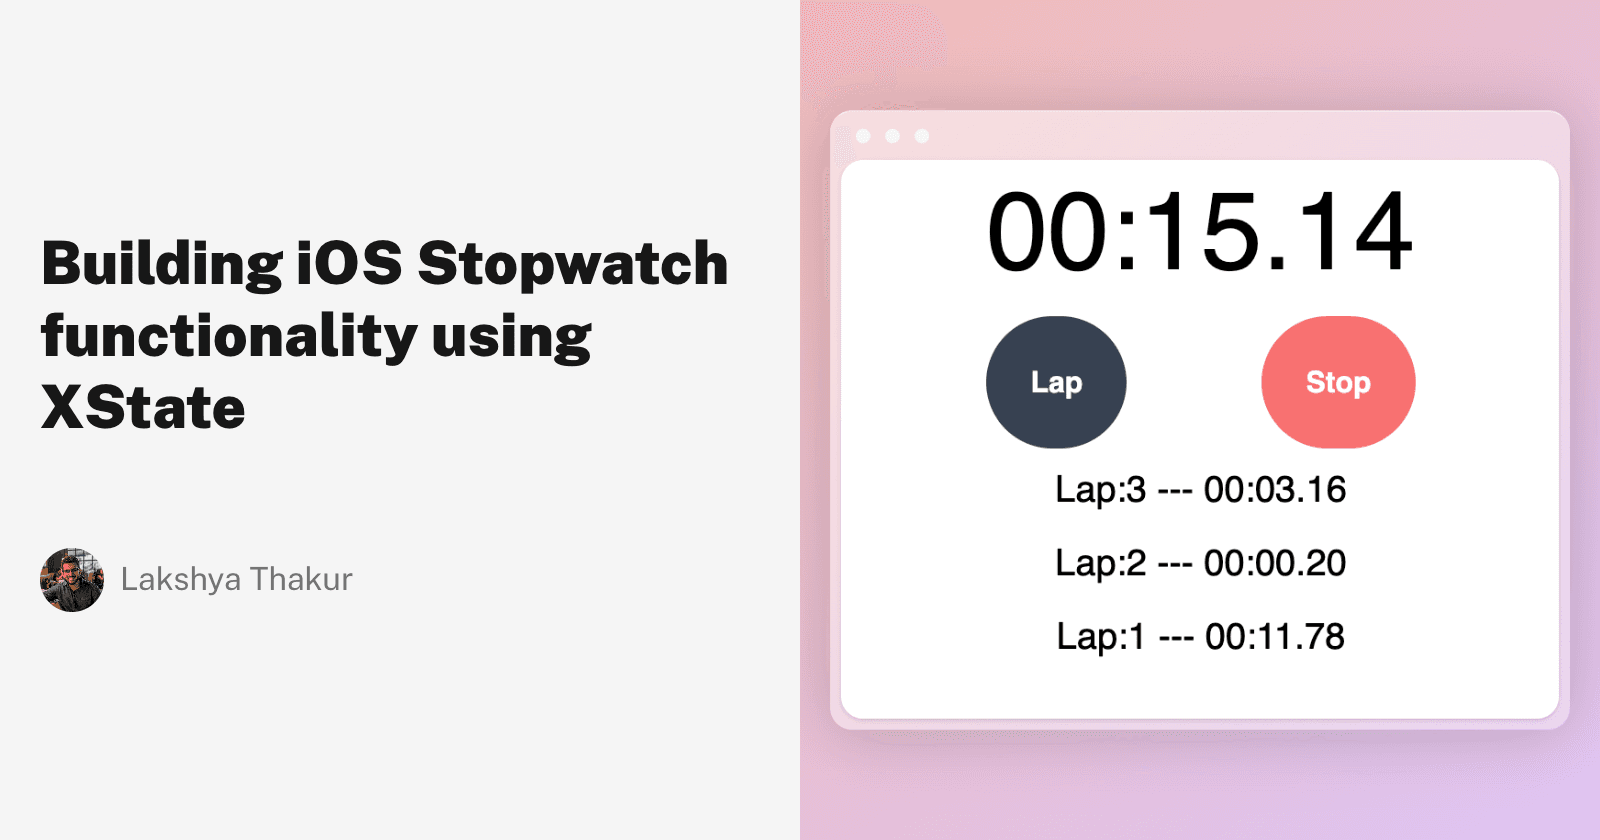
Building iOS Stopwatch functionality using XState
Have tinkered with JavaScript majorly | I like to solve problems on Stack Overflow, write blog articles, create a side project or do something creative.
Introduction

I have been meaning to try out xstate for long now by building a stopwatch example using it. For functionality, I referred to iOS's stopwatch in their native Clock App.
But why stopwatch ? Well, I was once asked in an interview to build the same and I struggled with it. For me, the struggling bit was visualizing the states the stopwatch can be. This is the code I submitted post interview (the interviewer was very considerate and told me that though I couldn't complete the implementation within time span, I can submit the solution later.)
function StopWatch() {
  this.timerStart = 0;
  this.timerEnd = 0;
  let time = { hours: 0, minutes: 0, seconds: 0 };
  let interval;

  this.setTime = function () {
    if (this.timerEnd) {
      time.seconds = (this.timerEnd / 1000) % 60;
      if (time.seconds === 0) {
        time.minutes += 1;
      }
      if (time.minutes === 60) {
        time.hours += 1;
        time.minutes = 0;
      }
    }
  };

  this.getTime = function () {
    return `${time.hours}:${time.minutes}:${time.seconds}`;
  };

  this.start = function () {
    this.timerEnd = this.timerStart;
    console.log(this.getTime());
    interval = setInterval(() => {
      this.timerEnd = this.timerEnd + 1000;
      this.setTime();
      console.log(this.getTime());
    }, 1000);
  };
  this.stop = function () {
    clearInterval(interval);
    this.timerStart = this.timerEnd;
  };
  this.reset = function () {
    clearInterval(interval);
    this.timerStart = 0;
    this.timerEnd = 0;
    time = { hours: 0, minutes: 0, seconds: 0 };
  };
}
Not my best code and actually doesn't feel intuitive enough. There are still no states for the stopwatch but merely functions that can start, stop or reset the timer and also redundant variables. So we will tackle the non-intuitiveness of this solution using xstate.
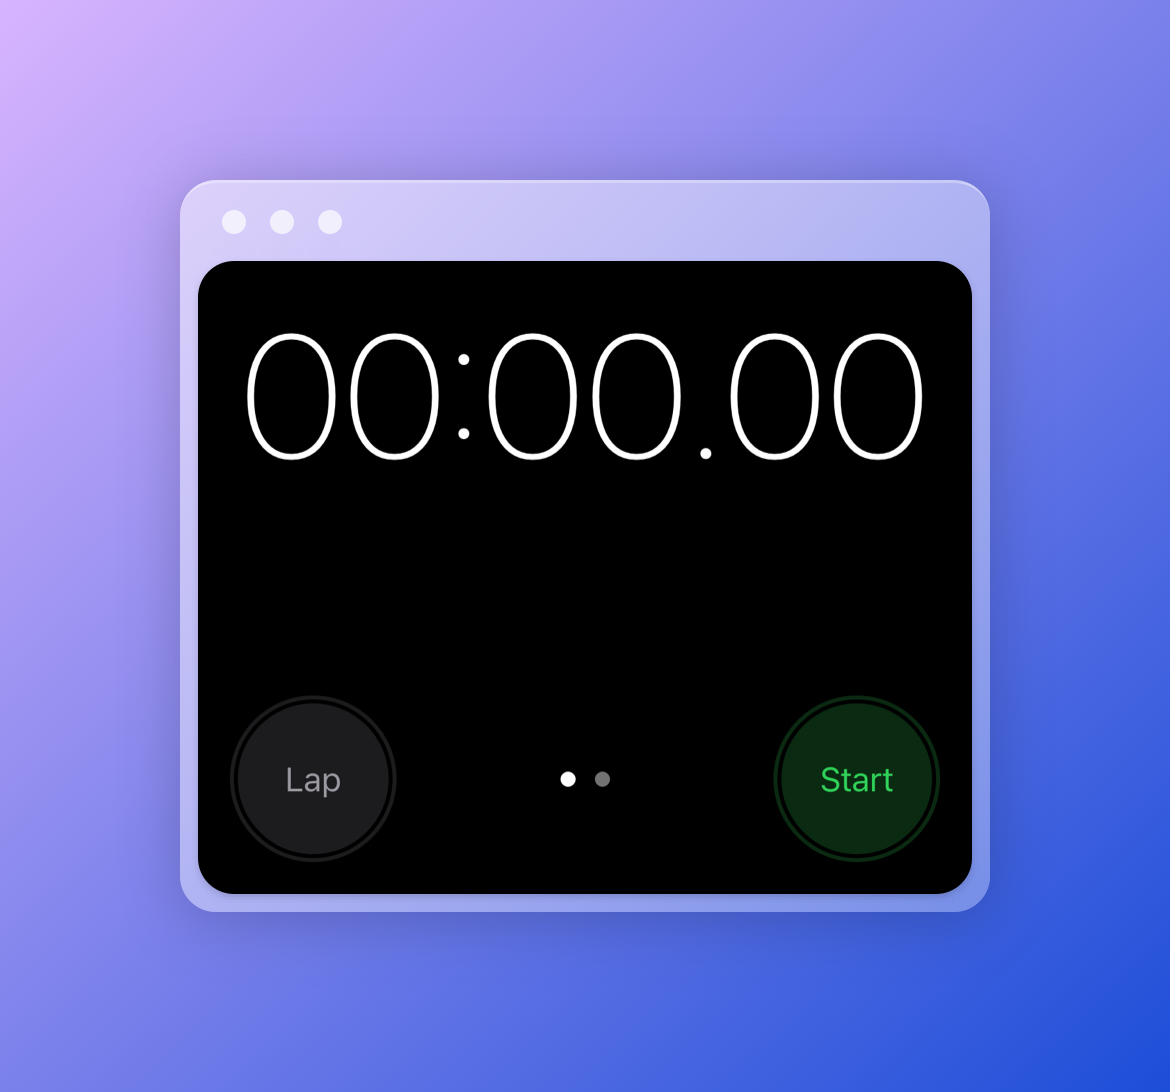
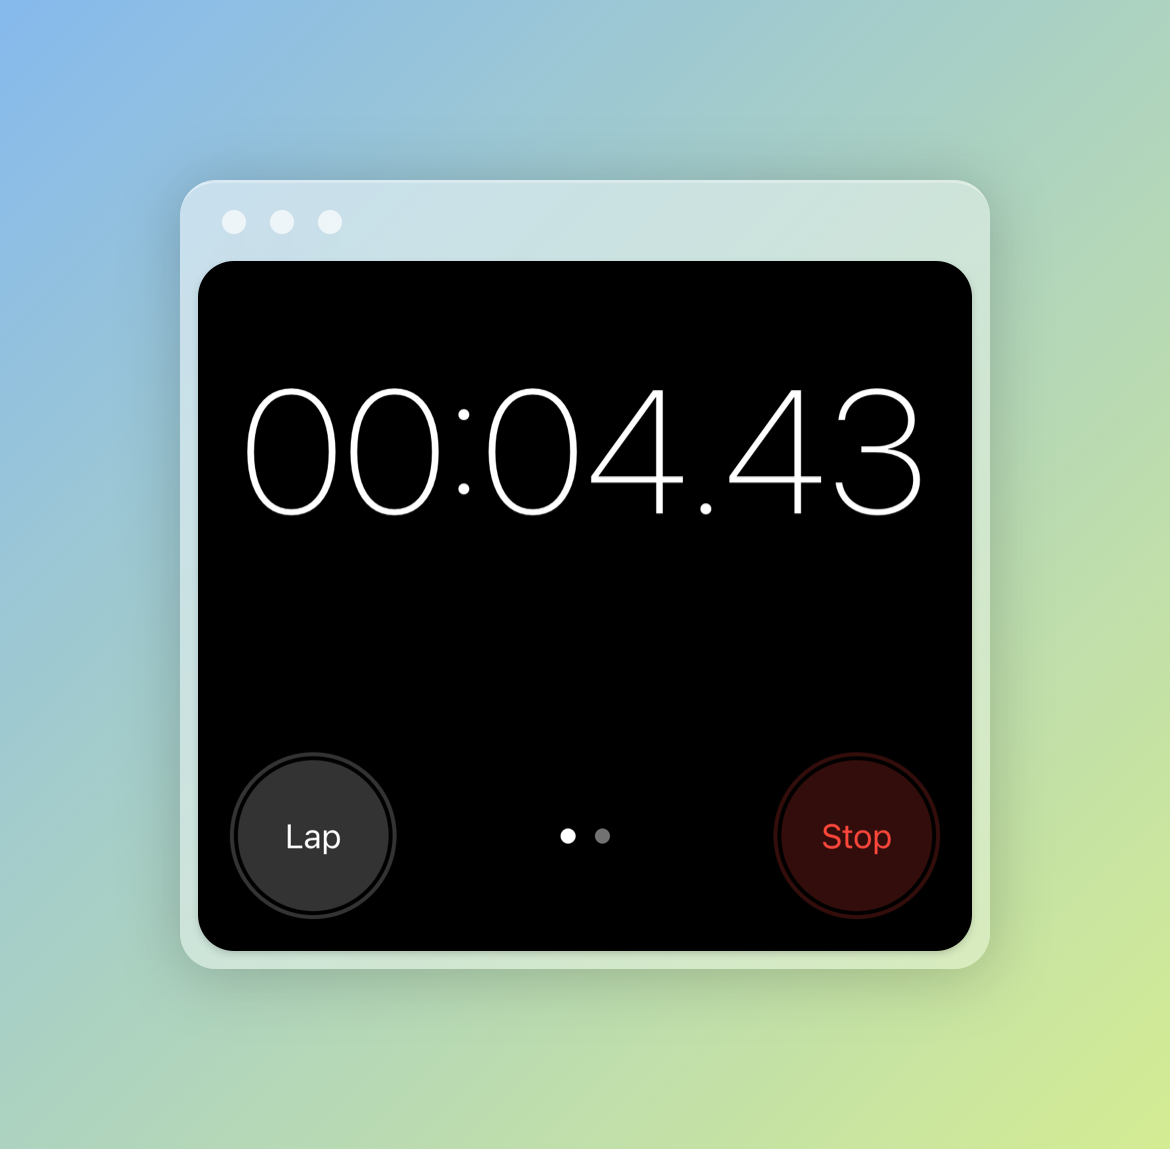
Reference Point
Here is what the iOS stopwatch looks like in it's initial state
Here is what the iOS stopwatch looks like in it's running state
Here is what the iOS stopwatch looks like in it's paused state
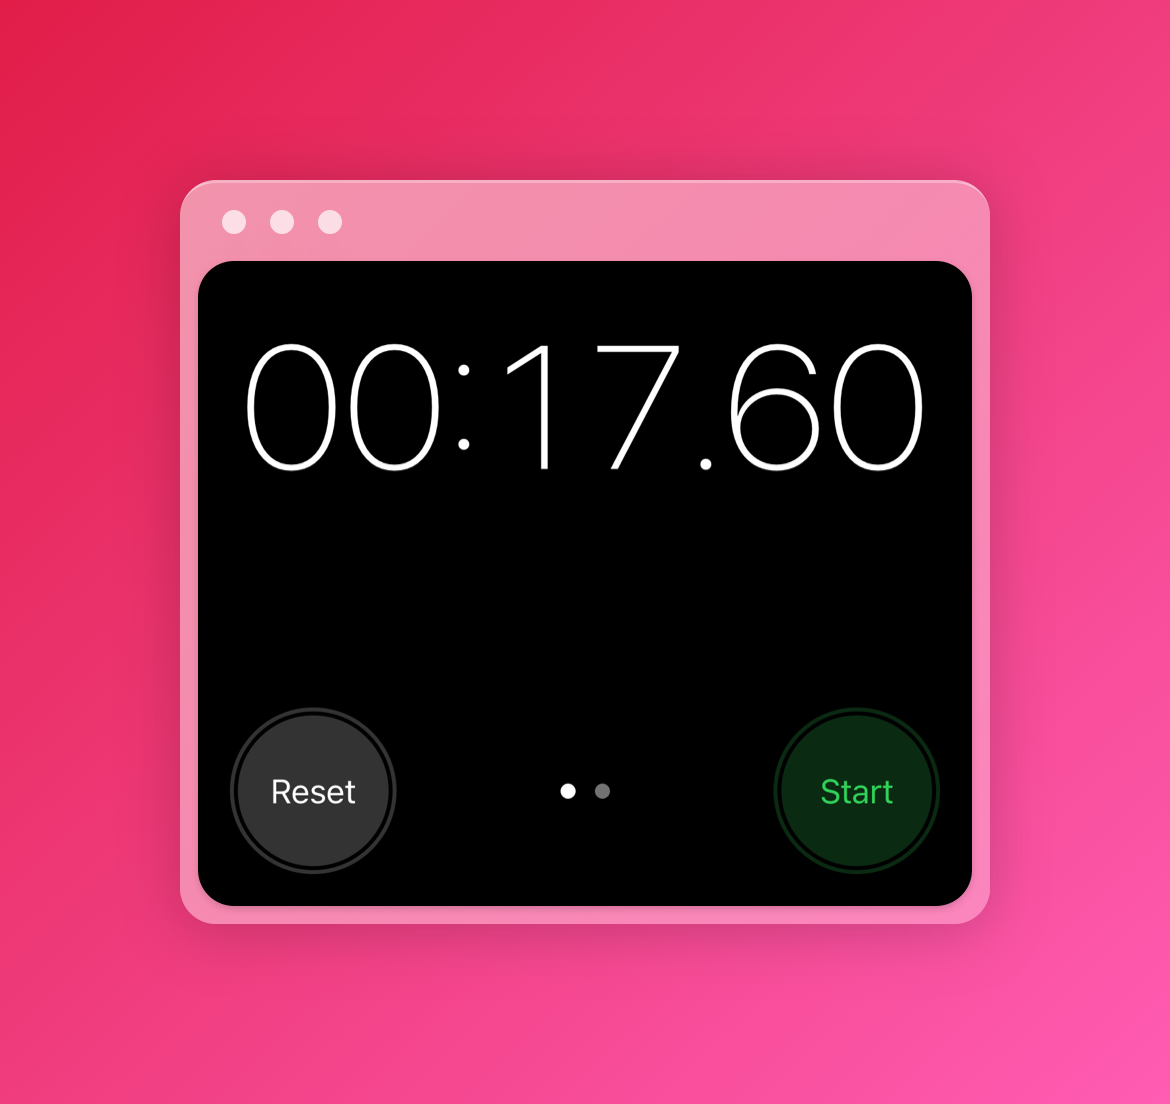
Using the app helped me land at the possible states faster.
Code Playground
Now before we proceed, I had no clue how the whole API works to create a state machine using xstate. So I went to their docs and landed on the stately visualizer where one can load the default example (a machine to visualize possible states when you do a fetch operation). One can just click on the Visualize button and also see a neat Statechart diagram on the screen depicting the actions and states of the machine.
So I begin with modifying this existing machine to create the stopWatchMachine.
Note :- The default code playground was in TypeScript and I stuck to it so you can ignore type specific tokens in the code I am going to share further.
Building the stopwatch without lap feature
In the screenshots of iOS stopwatch feature, you will notice that there also is a Lap button which is used create laps to measure in-between time intervals. We will get eventually to that but for starters, let's focus on start, stop and reset functionality.
Alright then, let's start with laying out some code now :-
Initial State
import { createMachine } from "xstate";
interface Context {
elapsedTime: number;
}
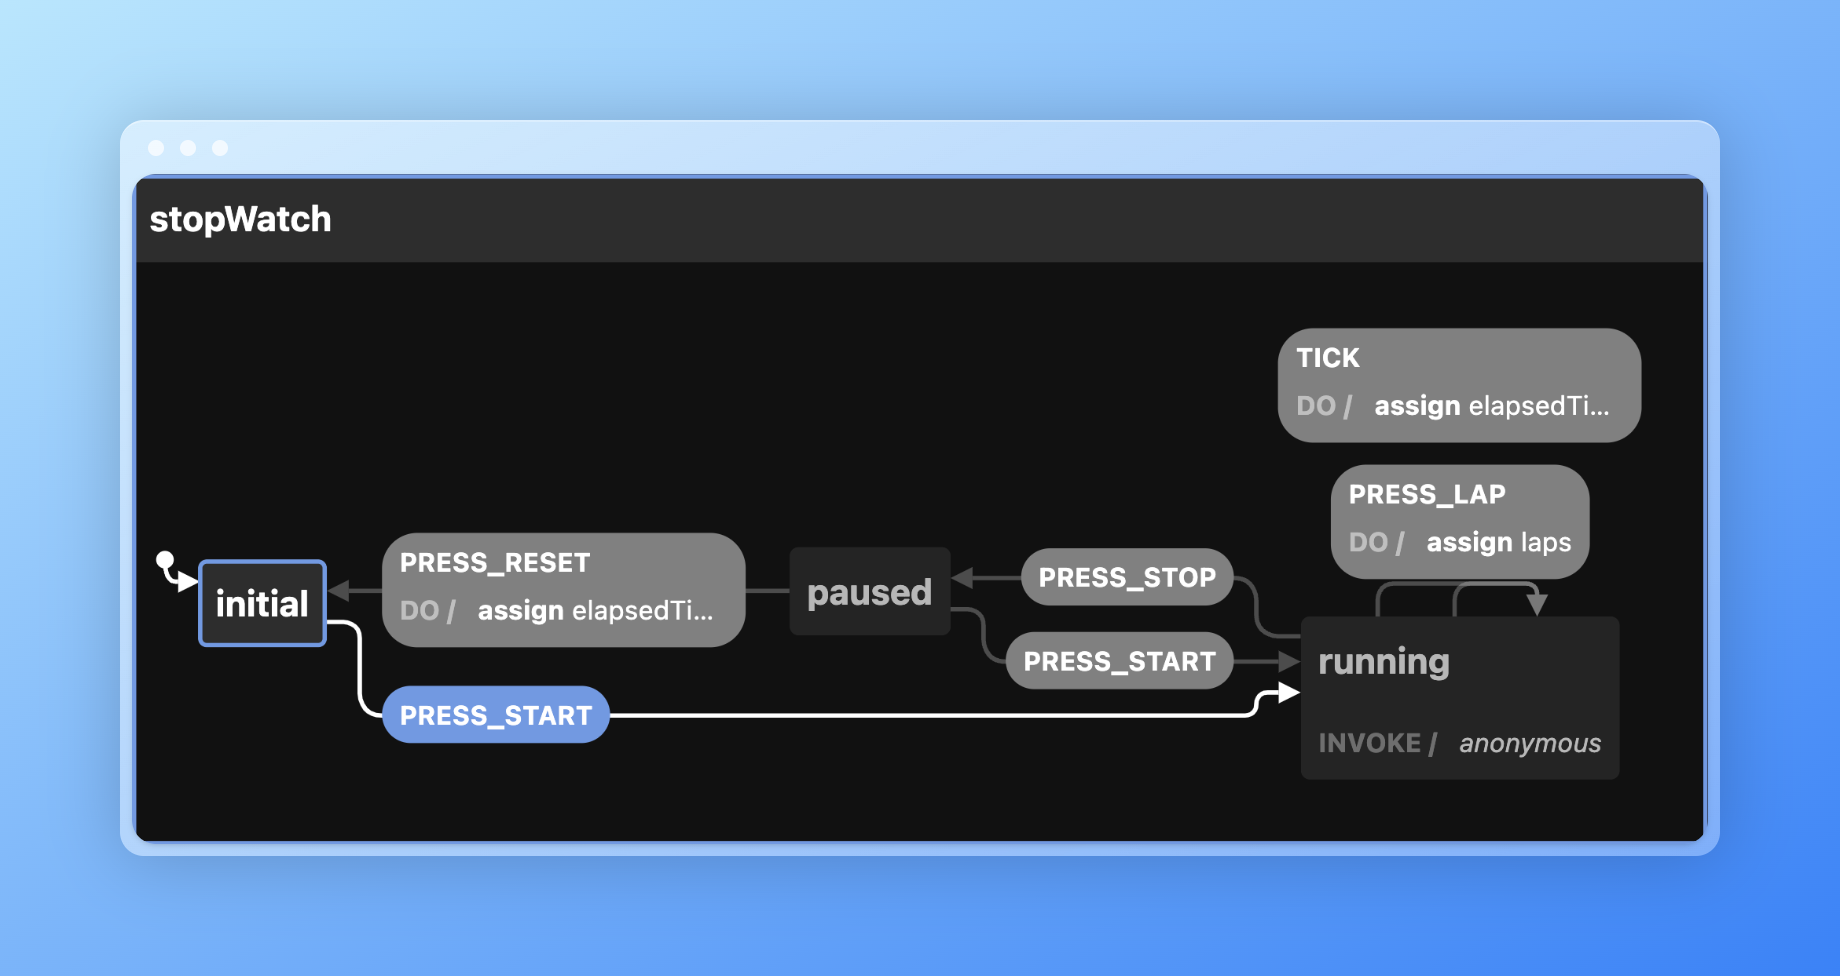
const stopWatchMachine = createMachine<Context>({
id: "stopWatch",
initial: "initial", // Note this can be anything - I just like to call it initial itself.
context: {
elapsedTime: 0
},
states: {
initial: {
on: {
PRESS_START: "running"
}
}
}
})
Explanation :
initialdenotes what our starting state is going to be when this state machine is created.contextis an object which holds the variables on which we actually want to operate. So in our case, we care about how much time has elapsed since you hit start on your stopwatch. We are measuring the value using theelapsedTimevariable.- Now comes the
statesobject which really forms the basis of the whole statechart paradigm. Our first state in it isinitialwhich itself is an object containing anonkey. Thisonkey contains key-value pairs ofevent : state to transition when that event happensi.e. when thePRESS_STARTevent happens, we want our state machine to transition torunningstate.
Note - Don't worry if you don't see anything like running state now. We will get to it in the next step. If you try to click on Visualize button at this point, the code playground will complain about running state not being present.
Running State
import { createMachine, assign } from "xstate";

interface Context {
  elapsedTime: number;
}


const stopWatchMachine = createMachine<Context>({
  id: "stopWatch",
  initial: "initial",
  context: {
    elapsedTime: 0
  },
  states: {
    initial: {
      on: {
        PRESS_START: "running"
      }
    },
    running: {
      on: {
        PRESS_STOP: "paused",
        TICK: {
          actions: assign({
            elapsedTime: (context) => {
              return (context.elapsedTime += 20);
            }
          })
        },
      },
      invoke: {
        src: () => (cb) => {
          const interval = setInterval(() => {
            cb("TICK");
          }, 20);

          return () => {
            clearInterval(interval);
          };
        }
      }
    },
}
})
Explanation : Sorry for bombarding you with a lot of code in one step but that's really what's happening while our stopwatch is in running state.
- Inside the
runningstate, we have aonbinding forPRESS_STOPwhich should bring the machine in thepausedstate. - Now comes the part where we start thinking about how to change the
elapsedTimevariable in a timer fashion. We know that a clock/timer works on basis of a certainTICKwhich happens every few milliseconds. So as soon as we enter thisrunningstate, we want to start a timer. To do this, we need to setup theinvokeproperty first. - One of the ways to achieve interval ticks in JS is via the
setIntervalAPI. Instead of modifying theelapsedTimewithininvokeobject, we will emit aTICKevent every20milliseconds (chose this for precision) using thesetIntervalAPI. Thecbis supplied by xstate and is used to send any events to the parent (in this case -runningstate is the parent). Also thatclearIntervalbit is not necessary but it's good to perform memory cleanups. - Alright, so now we need to listen for that emitted
TICKevent inside therunningblock also. Inside thisTICKevent, we want a certainactionto be performed. ThisactionshouldassignourelapsedTimecontext variable a certain value. So we simply incrementcontext.elapsedTimeby20on eachTICKand return it.
Paused State
import { createMachine, assign } from "xstate";

interface Context {
  elapsedTime: number;
}

const stopWatchMachine = createMachine<Context>({
  id: "stopWatch",
  initial: "initial",
  context: {
    elapsedTime: 0
  },
  states: {
    initial: {
      on: {
        PRESS_START: "running"
      }
    },
    running: {
      on: {
        PRESS_STOP: "paused",
        TICK: {
          actions: assign({
            elapsedTime: (context) => {
              return (context.elapsedTime += 20);
            }
          })
        },
      },
      invoke: {
        src: () => (cb) => {
          const interval = setInterval(() => {
            cb("TICK");
          }, 20);

          return () => {
            clearInterval(interval);
          };
        }
      }
    },
   paused: {
       on: {
        PRESS_START: "running",
        PRESS_RESET: {
          target: "initial",
          actions: assign({
            elapsedTime: (context) => {
              return (context.elapsedTime = 0);
            },
          })
        }
     }
}
}
})
Explanation :
- In the
pausedstate, currently, a user can press start to resume and go back torunningstate or a user can press reset to go back to theinitialstate. Theonbindings depict the above statement in a declarative fashion. - A few more things happen inside the
PRESS_RESETevent binding. Here we want changes toelapsedTimeas well as a state transition toinitialwhen this event gets emitted.context.elapsedTimeis reset to0using anaction.
Result
This partially completes the building of our state machine which can help us perform start, stop and reset operations of our stopwatch. We can create a stopWatchService like so and start using it :-
import { interpret} from "xstate";

const stopWatchService = interpret(stopWatchMachine);
stopWatchService.start();

// Now you can emit the events
stopWatchService.send({ type: "PRESS_START" });

(async () => {
  // delay is a promise wrapper on setTimeout
  await delay(2000);
  stopWatchService.send({ type: "PRESS_STOP" });
  await delay(2000);
  stopWatchService.send({ type: "PRESS_START" });
  await delay(2000);
  stopWatchService.send({ type: "PRESS_STOP" });
  await delay(2000);
  stopWatchService.send({ type: "PRESS_RESET" });
  await delay(2000);
  stopWatchService.send({ type: "PRESS_START" });
  await delay(5000);
})();
In case you want to listen to the state changes (which is needed if you want to consume the elapsedTime value or see what the current state of machine is), you can do so using callback inside onTransition function :-
const stopWatchService = interpret(stopWatchMachine);
stopWatchService.onTransition((state)=>{
console.log(state.context.elapsedTime, state.value)
})
stopWatchService.start();

// Start emitting events as shown in above code block
Building the stopwatch with lap feature
Before be proceed, here is how the Lap UI looks in the iOS app :-
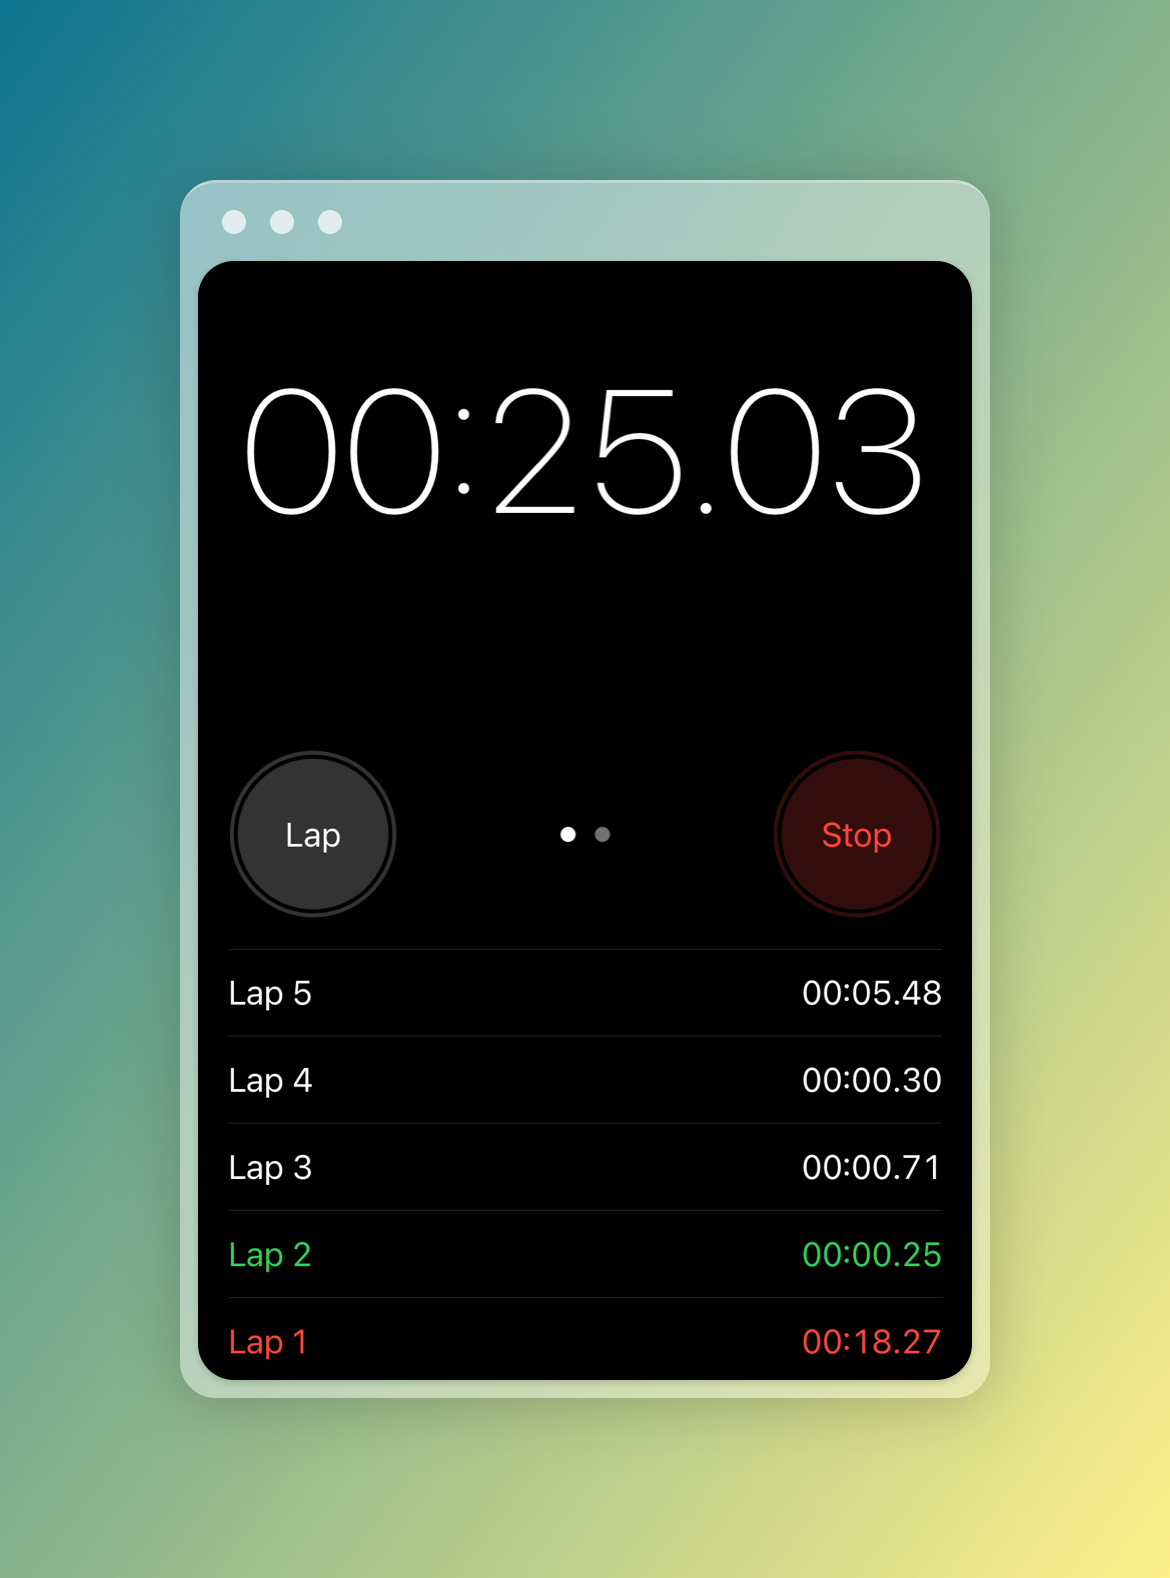
You can see that once a user hits the Lap button, an entry of that lap is added to a list as shown below the timer. So this means that besides elapsedTime, we also have to maintain a laps context variable which will start as an empty []. Also Lap button is only enabled for the user when the stopwatch is in its running state. This gives us enough info to add the lap feature to our state machine like so :-
import { createMachine, assign } from "xstate";

interface Context {
  elapsedTime: number;
  laps: Array<{ startTime: number; elapsedTime: number }>;
}

const stopWatchMachine = createMachine<Context>({
  id: "stopWatch",
  initial: "initial",
  context: {
    elapsedTime: 0,
    laps: []
  },
  states: {
    initial: {
      on: {
        PRESS_START: "running"
      }
    },
    running: {
      on: {
        PRESS_STOP: "paused",
        TICK: {
          actions: assign({
            elapsedTime: (context) => {
              return (context.elapsedTime += 20);
            },
            laps: (context) => {
              const laps = context.laps;
              const latestLap = laps[laps.length - 1] ?? {
                startTime: 0,
                elapsedTime: 0
              };
              if (laps.length === 0) {
                laps.push(latestLap);
              }
              latestLap.elapsedTime = context.elapsedTime - latestLap.startTime;
              return laps;
            }
          })
        },
        PRESS_LAP: {
          actions: assign({
            laps: (context) => {
              const laps = context.laps;
              const newLap = { startTime: context.elapsedTime, elapsedTime: 0 };
              laps.push(newLap);
              return laps;
            }
          })
        }
      },
      invoke: {
        src: () => (cb) => {
          const interval = setInterval(() => {
            cb("TICK");
          }, 20);

          return () => {
            clearInterval(interval);
          };
        }
      }
    },
    paused: {
      on: {
        PRESS_START: "running",
        PRESS_RESET: {
          target: "initial",
          actions: assign({
            elapsedTime: (context) => {
              return (context.elapsedTime = 0);
            },
            laps: (context) => {
              return (context.laps = []);
            }
          })
        }
      }
    }
  }
});
Explanation : Holy moly, the state machine is quite bigger than before. Yes because we want to deal with setting the laps context variable on appropriate machine states.
First let's see the introduction of PRESS_LAP event which can happen when machine is in running state. If that event happens, we don't transition to any other state. We just push a new lap to the the laps list inside our action block. Our lap data structure is an object which has two keys -
startTime- This will be equal to the totalelapsedTimeon the timer when thePRESS_LAPevent got emitted.elapsedTime- This will be theelapsedTimefor thatlap. We will see its derivation next.
Now, we already have a TICK event that happens every 20 seconds in the machine's running state. So now we also handle the laps context variable in the TICK event's action block. We only want the latestLap to keep respecting the dynamic timer. So we check the last element of laps list. If it's not there (for first lap), we insert one ourself with startTime as 0 and elapsedTime as 0. For each latestLap, we need to determine its elapsedTime. This can be done by subtracting the latestLap's startTime (Remember we set it when the PRESS_LAP event got triggered) from the total elapsedTime of the timer. After setting the latestLap, we return the laps object.
Also in our paused state, we have the PRESS_RESET event definition. Earlier we only reset the elapsedTime to 0. Now we will also reset laps to [].
Final Result
This finally completes the building of our state machine which can help us perform start, stop, lap and reset operations of our stopwatch. Interpreting and starting the machine will remain same.
Following is the visualizer diagram of our final state machine :-
Also here is a codesandbox implementation with UI as well. The UI is not polished and doesn't do justice to iOS styling. It's just to see our stopWatchMachine powering an UI :-
Closing thoughts
It's the declarative API of xstate which really abstracts that nested if/switch case complexity when one is building an application. Once the machine was setup, I liked how deterministic the behaviour was. Overall it was fun to scratch the surface of xstate by building this example. There also is a low-code way of making the statechart first which automatically create a machine for you. Haven't tried that but that sounds very cool.
Thank you for your time :)